Loading a Sea Kayak for an Expedition
Despite their relatively small size, a sea kayak can carry an amazing
amount of gear. One of the big draws of sea kayaking is that you can go
and explore some of the most beautiful, wild and remote parts of the
coast, for days or even weeks at a time and still live in relative
comfort.
 The good thing about packing a sea kayak is that there are three hatches to stuff full of gear and there will usually be enough free space to pack a few luxuries (a little extra weight will still float
just fine). The bad thing is the hatches are awkward shapes and nothing
fits in them easily.
The good thing about packing a sea kayak is that there are three hatches to stuff full of gear and there will usually be enough free space to pack a few luxuries (a little extra weight will still float
just fine). The bad thing is the hatches are awkward shapes and nothing
fits in them easily.
 I use the general rule that if you would not feel comfortable dunking an item into the ocean, then it must be stored in a water proof dry bag or container. Due to the oddly-shaped interior of most
kayaks, its usually a lot easier to use several smaller dry bags instead of
a few larger ones. Using different coloured bags or a label system to identify the contents of each a bag is advantageous.
I use the general rule that if you would not feel comfortable dunking an item into the ocean, then it must be stored in a water proof dry bag or container. Due to the oddly-shaped interior of most
kayaks, its usually a lot easier to use several smaller dry bags instead of
a few larger ones. Using different coloured bags or a label system to identify the contents of each a bag is advantageous.
The general rule of thumb is to pack the heaviest items as low as possible, centered along the keel line, and close to the bulkheads. Lighter items may be packed towards the ends of the kayak or used to wedge heavier items in place. The goal is to have the kayak trim, equally balanced fore and aft.

 Items such as spare paddles or kayak sails, would be impractical to store below deck and your only option is to secure them above. Due to their low weight and flat profile, these items are easily secured and don't generally get in the way or disrupt the handling of a kayak.

The items above are the standard items I would bring for a kayak camping expedition.
Camp Setup Items
My basic camp setup consists of a two person tent, inflatable sleeping mat and a sleeping bag. I also like to include a few luxury items such as an inflatable pillow and a small folding chair. I pack the tent at the very rear of the kayak, while the other items go into dry bags and stored in the front hatch.
 One of the most versatile items I always carry is a length of heavy duty black builders plastic. I use this primarily as a ground sheet to keep sand off of my gear and out of the hatches when loading or unloading my kayak. It can also be rigged up as a rain, wind or sun shelter and used to carry gear to and from the kayak.
Quick Access Bag
I use a green 5 litre dry bag stored in the day hatch of my kayak for emergency and other useful items which I use throughout the day. The dry bag is purposely coloured green to identify it and is the only dry bag I will open when on the water.

The orange fluid is "Citronella Oil" and is used as an accelerant for starting a campfire.
The 2mm green spectra rope is primarily used as a clothes line, but can also be used as a replacement rudder cable in an emergency.
Cooking Items Bag
I use a blue 8 litre dry bag to store all the items I require for basic meal preparation, along with cleaning and eating implements. To conserve space I have chosen lightweight items which are storable inside of each other. The knife is stored in a sheaf to prevent accidental cuts or damage.

Clothing and Toiletries Bag
In a yellow 20 litre dry bag which I load at the rear of my kayak, I store a warm jumper, towel and suitable clothing for the location and duration of the trip. I also store a spare roll of toilet paper and personal toiletries in this bag. Any wet or dirty clothing items are segregated in a separate plastic bag until they have been cleaned and dried.

Return to Civilisation Bag
I use a 2 litre red dry bag to store important items such as my wallet, keys, mobile phone and any official documents such as camping or access permits. This bag is secured to a fixed lanyard in the day hatch via a quick release buckle as an extra precaution.

Water and Food Storage
I have a 3 litre insulated bladder as my main drinking source while paddling. I top this bladder up as required with stored water which I keep in a small collapsible esky located directly behind the rear bulkhead. This esky can be filled with either water containers or Mylar bladders. The amount of water will depend on the duration of the trip and access to fresh water replenishment points. For a full day of paddling I allocate 4 litres of fresh water.
 The esky helps insulate the water from heating, provides a convenient method of carrying and stops the bladders or containers from moving around. I usually freeze the water bottles and enjoy cold water for the first couple of days. For overnight trips there is enough room in the esky to store the food items as well. For longer trips the food is stored in a separate bag.

When packing food, it is useful to separate it into breakfast, lunch and dinner portions for each day of your trip. I then seal each portion in a zip lock bag. To save space, discard any packaging which doesn’t need to come with you.
Move the food you will need while paddling that day into a place where it is accessible, snacks can go in a lifejacket pocket, lunch in the day hatch.
Summary

Keeping Your Gear Dry
The sealed hatches of a modern sea kayak are generally water-tight. However, leaks do happen. Your first line of defense against water ingress is to check that your kayak hatches are in good order and correctly fitted before setting off. As a secondary precaution, dry bags or waterproof containers can be utilised to keep your gear dry. I use the general rule that if you would not feel comfortable dunking an item into the ocean, then it must be stored in a water proof dry bag or container. Due to the oddly-shaped interior of most
kayaks, its usually a lot easier to use several smaller dry bags instead of
a few larger ones. Using different coloured bags or a label system to identify the contents of each a bag is advantageous.
I use the general rule that if you would not feel comfortable dunking an item into the ocean, then it must be stored in a water proof dry bag or container. Due to the oddly-shaped interior of most
kayaks, its usually a lot easier to use several smaller dry bags instead of
a few larger ones. Using different coloured bags or a label system to identify the contents of each a bag is advantageous.Packing For Trim and Handling
Once all your gear is packed into dry bags, you need to consider where to place them in the kayak. The way your gear is distributed can affect how the sea kayak sits in the water, which will in turn affect the kayaks handling. A trim kayak is best for all round performance.The general rule of thumb is to pack the heaviest items as low as possible, centered along the keel line, and close to the bulkheads. Lighter items may be packed towards the ends of the kayak or used to wedge heavier items in place. The goal is to have the kayak trim, equally balanced fore and aft.

- A rear heavy kayak will cause excessive Lee Cocking, ( turning away from the wind).
- A front heavy kayak will cause excessive Weather Cocking, ( turning into the wind ).
Keep The Decks Clear
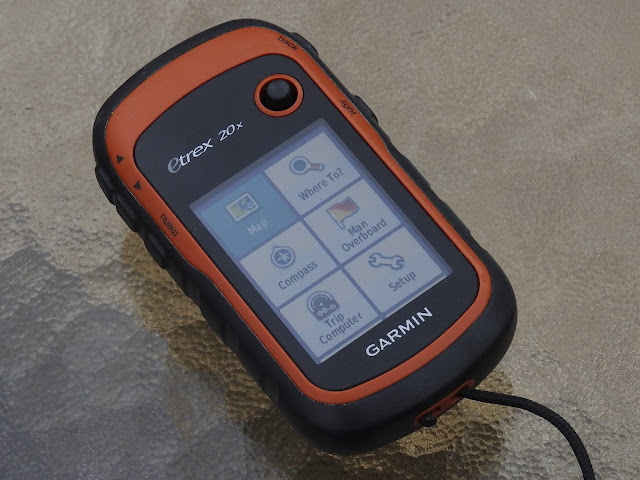
Where possible your gear should be packed inside the sea kayak and not strapped to the decks. Bulky gear stowed on the decks raises the centre of gravity, making it less stable and creates windage. Any gear which is not strapped down well, is also prone to being washed away in large waves. Active navigational gear such as a fixed compass and a GPS are the obvious exception to this rule.
What to Bring

The items above are the standard items I would bring for a kayak camping expedition.
Camp Setup Items
My basic camp setup consists of a two person tent, inflatable sleeping mat and a sleeping bag. I also like to include a few luxury items such as an inflatable pillow and a small folding chair. I pack the tent at the very rear of the kayak, while the other items go into dry bags and stored in the front hatch.
 One of the most versatile items I always carry is a length of heavy duty black builders plastic. I use this primarily as a ground sheet to keep sand off of my gear and out of the hatches when loading or unloading my kayak. It can also be rigged up as a rain, wind or sun shelter and used to carry gear to and from the kayak.
Quick Access Bag
I use a green 5 litre dry bag stored in the day hatch of my kayak for emergency and other useful items which I use throughout the day. The dry bag is purposely coloured green to identify it and is the only dry bag I will open when on the water.

The orange fluid is "Citronella Oil" and is used as an accelerant for starting a campfire.
The 2mm green spectra rope is primarily used as a clothes line, but can also be used as a replacement rudder cable in an emergency.
Cooking Items Bag
I use a blue 8 litre dry bag to store all the items I require for basic meal preparation, along with cleaning and eating implements. To conserve space I have chosen lightweight items which are storable inside of each other. The knife is stored in a sheaf to prevent accidental cuts or damage.

Clothing and Toiletries Bag
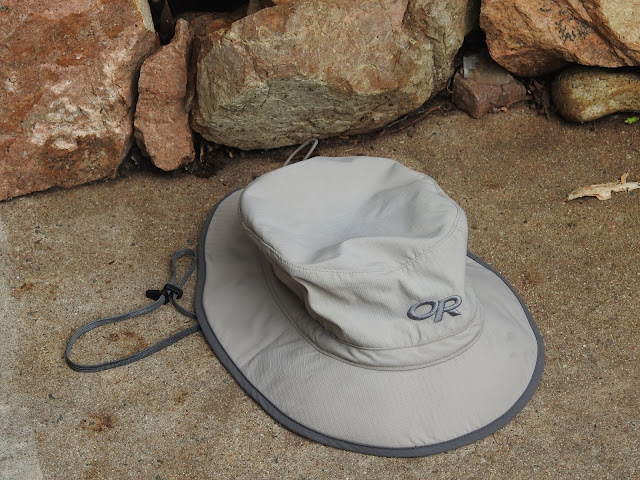
In a yellow 20 litre dry bag which I load at the rear of my kayak, I store a warm jumper, towel and suitable clothing for the location and duration of the trip. I also store a spare roll of toilet paper and personal toiletries in this bag. Any wet or dirty clothing items are segregated in a separate plastic bag until they have been cleaned and dried.

Return to Civilisation Bag
I use a 2 litre red dry bag to store important items such as my wallet, keys, mobile phone and any official documents such as camping or access permits. This bag is secured to a fixed lanyard in the day hatch via a quick release buckle as an extra precaution.

Water and Food Storage
I have a 3 litre insulated bladder as my main drinking source while paddling. I top this bladder up as required with stored water which I keep in a small collapsible esky located directly behind the rear bulkhead. This esky can be filled with either water containers or Mylar bladders. The amount of water will depend on the duration of the trip and access to fresh water replenishment points. For a full day of paddling I allocate 4 litres of fresh water.


When packing food, it is useful to separate it into breakfast, lunch and dinner portions for each day of your trip. I then seal each portion in a zip lock bag. To save space, discard any packaging which doesn’t need to come with you.
Move the food you will need while paddling that day into a place where it is accessible, snacks can go in a lifejacket pocket, lunch in the day hatch.
Summary
- Have a well refined and practiced system for loading the kayak and stick to it.
- Everything you want to keep dry goes into dry bags or sealed containers. (Everything!)
- Spread the weight evenly between the front and back compartments, with heavy items at the bottom of the kayak and close to the bulkheads.
- Pay particular attention that your packed items are wedged in place and don't move around.
- Avoid having bulky gear on top of your deck.
- All the things you need to get at quickly should be stored in the day hatch.
- Several smaller dry bags are easier to pack then a few larger ones.
- Choose food items appropriate for the trip, that require a minimum of fuss to prepare. Also bear in mind any packaging or containers that can't be burnt off in a camp fire will have to be taken out with you when leaving the campsite.
Comments
Post a Comment