Mirage 582 Kayak Modifications
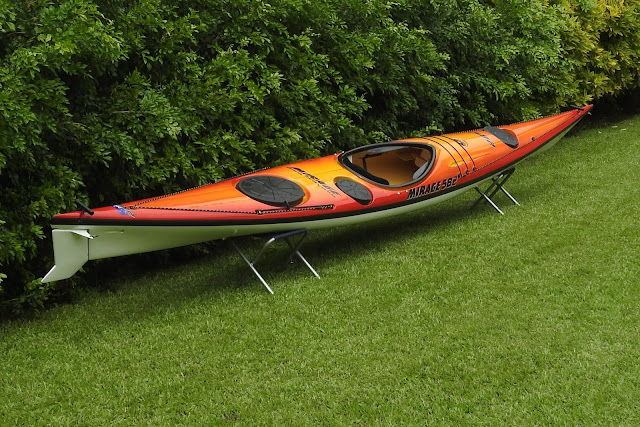
This is my brand new custom made Mirage 582 Sea Kayak. It has a Kevlar hull joined to a fiberglass deck with reinforced seam lines inside and out, as well as extra reinforcing for a kayak sail on the front deck. I chose a deep red to yellow fade pattern with black trimming around the seam line, cockpit coaming and thigh braces. Front and rear carry toggles and thigh braces were installed at the Mirage factory, but I chose to do the rest of the fit out myself.
Deck Compass
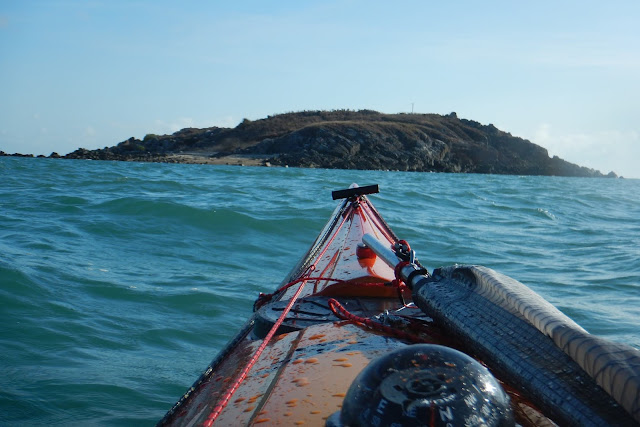
I chose the Ritchie deck compass, as it is a fairly robust unit with a five year warranty. The graduated display, can easily be viewed from the cockpit, even when only glimpsing at it in trying conditions. The compass connects to a base plate, which is permanently mounted to the deck with four bolts. It is essential that the compass base plate be aligned to the centreline of the kayak or you wont be following a true course.
If you paddle in anything other than flat water, you should have a hands-free bilge pump system capable of pumping out the cockpit while still paddling. In rough seas, you don’t want to be sitting still, with water sloshing in as fast as you pump it out. For this reason, I chose to install the Rule submersible 12 volt electric bilge pump to my new kayak.
 The pump, bracket and plumbing are installed behind the cockpit seat, where it will be out of sight, when the backrest is clipped into place. The pump bracket is centered horizontally along the rear cockpit bulkhead, and high enough so that the pump strainer is just touching the bottom of the cockpit floor. Two 4 mm bolts hold the pump bracket in place as well as providing the attachment points for the battery retaining bracket, on the opposite side of the bulkhead.
A large hole is drilled on the top deck, behind the seat and shaped with a Drenel grinding tool, to accept a 3/4 inch "Acetal Skin Fitting. The skin fitting is inserted through the hole, sealed with Sicaflex and locked in place by a retaining nut on the under side of the deck. A section of 19 mm flexible hose completes the plumbing circuit from the pump to the skin fitting.
The power cables from the pump go through the rear cockpit bulkhead via a rubber sealing grommet, into the day hatch. A waterproof toggle switch is installed through a purposely recessed area on the rear deck above the day hatch, and is connected in series with the bilge pump and power source.
 A long flat deck pad-eye is installed over the external part of the switch to help protect the switch from accidental damage or activation. As a further precaution, the external waterproof sheath for the switch is filled with dielectric grease to prevent water ingress, should it tear.
A small 12 volt S.L.A battery located in the day hatch provides power to the system. The battery sits on a piece of closed cell foam and is held firmly in place with a loop of shock cord wrapped around the battery, and attached to two brackets.
- Sikaflex sealant is used to seal around all holes drilled, as well as being applied to all bolt threads, washers and under sides of switches and fittings.
- The pump is capable of pumping 31 litres of water per minute and has the advantage of being able to run dry (without water).
- Drilling large holes into a brand new kayak is very daunting, but the overall installation process was fairly simple, although time consuming.
Towing Points
Tow ropes, along with an easy to access tow point are essential safety items for any kayak. Fortunately the Mirage 582 sea kayak has two seat mounting bolts on either side of the cockpit which are ideally located and make an extremely secure attachment for a towing point.
The tow point assembly is made from a 200 mm long x 25 mm wide piece of webbing strap which is folded in half and has a 25 mm stainless steel D-Loop inserted between the straps before sewing off the open ends.
The D-loop is now sewn into the strapping slightly offset from the center. This is done so as to ensure the tow rope attachment shackles will rub against the strapping rather then the shiny gel-coat finish of the kayak.
Using a hot soldering iron, two 6mm holes are pierced into the strapping, to coincide with the seat bolt spacing. Undo the seat bolts and install the tow point assembly on the outside of the kayak and tighten the bolts back up again. The process may be repeated on the other side if two tow points are required.
Custom Graphics
I wanted to add a customized decal to give my kayak a personal touch and to stand out from the normal line up. I found the "Bad Ass Skeleton Fish" design to perfectly match the space, colour scheme and the vibe I wanted to set. It is printed on premium quality air release vinyl with UV stabilised ink. The air release adhesive has thousands of micro air release channels, allowing bubble free application.
Below Deck Hydration System
For water storage I prefer to use an insulated 3ltr water bladder strapped to the cockpit floor with a drink tube and a bite valve. The tube exits the cockpit through a sealed opening on the rear deck just behind the seat.
By strapping the water bladder to the cockpit floor you have significantly lowering your center of gravity, with a noticeable difference in stability. As the water is under cover it stays cooler for far longer then if it was strapped to the top of the deck in full sun.
 The first step is to make the attachment points to hold the water bladder to the cockpit floor. These consist of loops of spectra rope which have been bonded to the floor with a mixture of epoxy resin and microfiber filler. Epoxy resin alone would be to brittle, cracking and releasing the rope.
I wrapped the 4 loops of 3 mm spectra rope around molded pieces of bluetack. The bluetack helps the rope loops keep their shape and provides temporary adhesion to the cockpit floor while positioning and waiting for the epoxy and microfiber mixture to set hard.
Four slots were cut into a piece of 2 mm thick insertion rubber. These slots align with the loops and allow the loops to protrude through the rubber. A length of 4 mm shock chord is threaded through the protruding loops and is attached to an olive cleat for easy adjustment. The shock chord forms the retaining strapping to hold the bladder and the insertion rubber in place.
The insertion rubber extends all the way to the foot plate and provides scratch resistance and foot cushioning.
Note: I originally used closed cell foam instead of insertion rubber, hence the pictures above showing closed cell foam. After a while the edges of the closed cell foam began to severely curl up and became unsightly. The closed cell foam was replaced with 2 mm insertion rubber which forms perfectly too the hull shape.
The first modification was to extend the length of the drink tube by adding an inline joiner and a section of standard drink hose to the bladder.
The flanged end of the hose connecting attachment was then ground flush with the outside diameter of the drink tube. This allows the end of the outer tube to slide in and out of the sealing gland, for easy removal / installation.
A hole is drilled to fit a "Cabac GN20" electrical cable gland in the rear deck behind the seat. It is important to position the gland end inside the cockpit, where it is easy to get to, to tighten / loosen the gland sealing nut. A rubber washer and a small rim of Sikaflex ensure the cable gland seals tightly to the deck and any excess thread protruding through the deck is trimmed off flush with the locking nut.
 The cable gland is suitable for cable/tube diameters 8 to 13mm, and is used to create a sealed deck opening for the outer drinking tube. A small rubber bung seals the deck opening for the drinking hose if the tube is removed.
Kayak Sail
I decided to install a " Sea Dog Commander Clear View Kayak Sail. " This type of sail has a fully adjustable boom capable of being set at any angle. The mast is mounted onto a flexible coupling and held rigidly in place by three stay ropes and an uphaul line. By either tightening or releasing the uphaul line the mast can be easily erected or lowered respectively. With the addition of a few quick release shackles the entire Sail and rigging can be removed or set up on the kayak in seconds.

Kayak Sail Hardware to be permanently fitted to the kayak
I found that positioning the centre of the base plate along the centre line of the kayak at a distance of 1355mm from the very front of the cockpit coaming gave the best mast positioning. The under side of the deck below the base plate is reinforced by laminating three 150mm x 150mm layers of heavy duty fiberglass Chopped Strand Mat.

I use two deck pad eyes located either side of the base plate as side stays. It is important to place the centre of the side stay approximately 15mm behind the centre of the base plate. You also want to have the side stays spaced as wide as possible, while allowing enough clearance from the edge so as not to impede the large penny washer sitting flush on the underside of the deck.
The back stay consists of a single deck pad eye located along the centre line of the kayak. The specific location of the back stay is not critical, so I located it midway between the 582 decal and the front hatch.
As both the mast base plate and the back stay sit on top of a V shaped ridge a small amount of "Selleys Knead It" two part epoxy putty was applied to the under side of the deck directly below these fittings to make a flat base for attaching the fasteners.
The main sheet pulley block attaches to the back stay pad eye.
The uphaul pulley block attaches to a length of 4mm chord threaded through and tied off to make a loop through the front deck-line holes.
When not in use the sail is attached to the deck with a length of shock chord and a olive cleat
- All fittings are secured in place with 4mm bolts, large penny washers and Nylock nuts.
- "Sycaflex" marine grade sealant is applied to all the holes and shaft threads.
- "Selleys Knead It" was applied to the under side of the deck to make a flat base for attaching the fasteners where required.


Such a good look, amazing man. Thanks for sharing such a beautiful information with us. Closed Cell Foam
ReplyDelete